Part 1. Getting started
1.2 Your account
Your photo, the passkeys you have added for each device, and why Kestrel sometimes will not let you remove the last one.
Written forRegistrarFront officeTeacherHead of house or yearWellbeingCounsellorLearning supportChild safety officerCase managerDeputy case managerNursePrincipal and executiveBusiness managerIT
What the account page is for
The account page is where you manage how you sign in and how colleagues see you. It has two parts: the photo that appears beside your name, and the passkeys that let you sign in without a code. Your name and address come from the school, so you change them by asking the office.
Open your account
- Press your photo or initials at the top right of the band. The label for screen readers is "Account menu".
- Choose "Account". The page is headed with your name, with your address under it.
The same menu includes "Quality", "Guides", "Support" and "Sign out". An administrator also sees "Settings", and a reader who may read the audit trail sees "Audit trail". A member of staff the school has also given family access sees "Family portal". The last line of the menu is the build you are using, which is worth quoting when you contact support.
Account
/accountYour photo and your passkeys. Any signed-in account can open it, and the photo section is shown only to someone who works at a school.
Your photo
Staff at your school see your photo beside your name, in the account menu, in lists and on records. Until you add one, Kestrel shows your initials.
- On the account page, find the "Photo" section.
- Press "Add a photo", or "Change photo" if you already have one, and choose a picture from your device.
- Wait for the message "Your photo is saved." The account menu changes at once.
- To go back to your initials, press "Remove" in the same section.
A photo can be a JPEG, a PNG or a WebP image up to 10 MB. If you choose another kind of file, Kestrel says "A photo has to be a JPEG, PNG or WebP image." and keeps your current photo.
Your passkeys
A passkey lives on one device. If you sign in from a work laptop, a phone and a classroom computer, each needs its own passkey. The "Passkeys" section lists each one you have, with the date it was added.
- Under "Passkeys", press "Add a passkey".
- Confirm on the device with your fingerprint, face or PIN.
- The new passkey appears in the list with today's date.
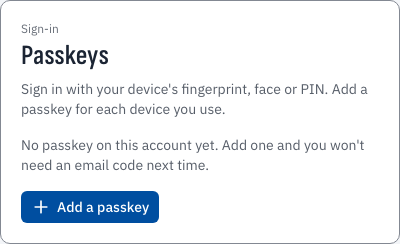
/accountIf that device already has a passkey for your account, Kestrel says so and adds nothing. If you cancel the device's prompt, the page says the passkey setup was cancelled, and you can try again.
- Add a passkey for another device Add a passkey for another device
Removing a passkey
- Find the passkey in the list. The device is named, with the date it was added, so you can tell which one you are cutting off.
- Press "Remove" beside it.
Remove a passkey when a device is lost, stolen or handed back. That device can no longer sign in as you.
Journeys
Settings
Whether emailed codes work, and whether passkeys are required, are decisions for your school. An administrator makes them on the "Sign-in" page of Settings.
Training notes
Everyone needs this chapter, and it takes about five minutes. It pairs with the signing-in chapter in the first session for any role. Ask each person to add a photo and a second passkey before they leave the room.